Contact Mike or Nicole and give them words of encouragement.

Nicole Holden : mwestpress@gmail.com Mike Holden : mholdendesign@yahoo.com


Monday, March 4, 2013

March FORTH

We moved in to the Bay View Bungalow exactly 2 years ago today, March Fourth, 2011. We've done a lot in two years - I won't list it all right now, but we really have done a lot. We really didn't know what we were getting into when we signed on the dotted line. The house was "turn-key" with a brand new kitchen. Sure, we wanted to redo the upstairs eventually, but we figured we could knock that out in no time, once we got to it, then sit back and relax.

Well two years later, there is no end in sight to the restoration that is the Bay View Bungalow. The good news is that the house is completely livable. The "Bad News"? We have a lot of interior finish work to complete and a whole lot of deferred maintenance to address on the exterior; mostly paint, and rotted shingles, and refinishing two storm doors, and...

Fortunately, we (and sometimes just I, but mostly we) still enjoy the work and approach things with the same enthusiasm that we did in the first few months of working on the house, and we will continue to do so. March Fo(u)rth, after all, is about moving forward. Which is why it is so fitting that Nicole, who I am so proud of, also happened to start a great new job as an Art Director at a Milwaukee-based Ad Agency today. So, March Forth we will. (have I crammed that pun down your throat enough yet?)

Before-and-after composite; the bedroom as appears today, with an
overlay of me tearing it apart on day three of new home-ownership


(...Also, thanks to Steph Rose for pointing out the meaning of March Fourth to us upon closing on the Bay View Bungalow; the meaning would have otherwise been completely lost on us)

Tuesday, February 12, 2013

Facade Restoration; Phase Two

OK - I couldn't resist! I just had to see what the Bay View Bungalow will look like after the facade restoration is complete, so I photoshopped the gable, eaves, etc. Notice we also have copper gutters - there is paint available for this exact purpose; it has real copper in it and will develop a patina over time. Our modest bungalow would not have had copper gutters, but they would look a lot better than the painted aluminum we have now. Also note how much better the house looks without shutters. It makes me want to climb out on the snow-covered roof and rip them off right now!

future state
 
current state

Sunday, February 10, 2013

Phase one of the Facade restoration Complete

The best part of any home restoration blog is always the before-and-after shots. Since the completion of the large storm window marks the completion of Phase-One of the facade restoration, we figure it's time to share.

What constitutes phase one you ask? What we're calling phase one is basically the facade from the porch roof down. This spring we'll tackle Phase-Two; everything from the roof-line up. This will include removing the awful '60s shutters, painting everything, and installing period correct screens (partly to hide the white vinyl replacement windows).


In the mean time however, we're quite pleased with the transformation. As a side note, any true home restorer would point out how "incorrect" the asbestos siding is, but removing it and restoring the original siding is just beyond what we're willing to tackle (I've seriously thought about it, but I'd rather stay married) Besides, all things considered, I think it looks OK; it's in great shape, it holds paint well, and with all of the other "correct" details, it's very easy for the casual observer to look past and see an "original" bungalow.

And, just because, here are some progress shots of the windows / trim:

The window and trim as it looked after removing the '60s era shutters. Note the brown overspray at the edge of the shutter outline; the whole house was painted this color in the '80s. Our neighbor said they got overspray all over his house when they did it.

There were so many layers of paint that had been applied over cracked peeling paint
that the only thing to do was strip the trim back to bare wood in most places.
Tedious work with the heat gun, but well worth the trouble.

The same section as it appears today; still some paint work to be done above the
green trim. The original storms were also stripped and repainted, including
the original hardware.

Building a Storm Window the old-fashioned way

In addition to replacing original wood porch columns with faux wrought iron, the other architectural bastardization that was common in the 1960's was to remove original double-hung windows and replace them with a "picture window". The Bay View Bungalow unfortunately fell victim to this trend in the name of "modernization".

What we are left with, is an expanse of glass on the front of the house that looks very out of scale with the two original windows that flank it. (this would have originally been a bank of four matching leaded glass windows; the two in the center were removed and replaced with one window). The icing on the cake is the Craptastic aluminum storm window that was installed over it.

picture window with aluminum storm
Since recreating and installing the missing windows was out of the budget, our solution was to build a traditional wood storm window to match those on the original windows and break up the huge expanse of glass by incorporating divided lites (individual panes) to give it a period-correct look. This would at least create the illusion that the larger, center window was an original feature.

In order to really "sell" the illusion, we built the new storm window in exactly the same way it would have been built in 1930; meaning we built it to last, with mortise and tenon joinery (alright - and, yes, a few lap-joints), real, rather than applied, muntins (window "dividers"), and glass held in place with glazing points and sealed with traditional glazing compound.

Rather than bore you with the whole process, I will instead point to this person's blog post that I used as a guide in creating our window. Below are a few highlights from our window build.

open mortise-and-tenon joint
muntins before being glued in place
gluing everything up
chiseling out the corners of the window pane channels
   

Kirby and the finished frame
priming the frame
glazing the panes
finished window installed

We are thrilled with the results! In the spring we'll take the window down and paint the glazing compound to match. (It will take quite a long time for the putty to cure - and can't be painted before then)


Update: this blog is not dead (just very neglected)

What's been going on at the Bay View Bungalow? Well, we've been busy. There have been lots of small projects (and a few big ones). Mostly though, we've been busy with this guy:

Kirby at about 8 weeks
Kirby is our new addition to the family - he is a (now) 8 month old Welsh Corgi and has kept us very occupied. So, between him and life as a whole, we've been letting the blog languish for far too long.

So, we intend to remedy our lack of updates in short order with some posts on recent progress (although we haven't been keeping up the Blog, we've been documenting the progress by taking LOTS of photos) Stay tuned...

Friday, May 18, 2012

A Front Porch to Match


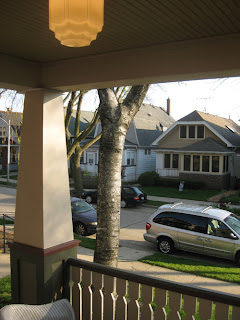
Before we even closed on our home, we immediately wanted to tear down the 60's era faux wrought iron supports on the porch and bring the facade back to its original state. We did some research on the home, but failed to locate any images from before they were installed. Luckily our style of home has many similarities to others in the neighborhood which still have their original porches. (The home three doors down from us is nearly identical, and it's original porch is intact) We used those as a guide and built ourselves a brand new porch that looks like it could be original. We also swapped in an antique light fixture and developed a new paint scheme (which we are still not quite done with so try and ignore the bright red trim on the top - that will soon be the darker shade of green). We are very excited to see the house regain its original identity and still can't believe what a difference it has made. There is still work to be done to finish this project (trim at the tops of the columns, paint, stair railing, etc.), so stay tuned...

Wednesday, May 16, 2012

Backyard Patio.


Our backyard has been basically neglected up until now, apart from the occasional grass cutting to keep the neighbors from calling the city on us we have been focused on the inside of the house since we purchased it last March. We decided to finish what we could inside in time for the enjoyable weather.

We didn't have to many things on our list when it came to getting the yard back in working shape. First was that orange mulch again that the previous owners seemed to love so much. We were able to craigslist it, because you can't throw away mulch apparently. So someone in the neighborhood picked it up for their compost pile. Our yard is not huge so taking advantage of space is a huge priority, so we decided to tuck away the patio against the garage and the back end of the yard would be designated to seating and the bbq. It would also make the view of the garage look a little bit more inviting from the house. We started to dig out the perimeter and found that there was actually a previous concrete slab left over from a prior owner. We found that it was a good size and it would be perfect for our foundation which cut out a ton of work and some money. Probably the one unexpected find that was actually a advantage so us so far. So it ended up being about 11x14 and we went with a "cream city" looking brick in a herringbone pattern to fit the era of the house. There a few details that we need to wrap up still (I feel like I just need to end every post with that statement)

I usually don't put how long things take us on here, because they always take longer then expected but to lay out the entire patio it actually only took us one weekend. It was possibly the quickest most rewarding thing we have done so far. As for the grass through all the digging we had to do, we are attempting to grow weed free grass which is taking a bit longer.